Tampilkan postingan dengan label Audio Players. Tampilkan semua postingan

Selasa, 24 Agustus 2010

Sansa Fuze Error "Please Obtain License..."

Error Message on the Sansa Fuze:

Please obtain license by transferring this title to device using audiobook software.

The device will play a WMA audiobook for a short period of time and then this message will appear on the Fuze's screen.

From Tech Support:
The error message received usually indicates that there was a problem transferring the license information.  Please ask your patron to try transferring this title again using the following steps.
(Please note: Do not connect the device to the computer until step 4.)

1. Power on the device and select 'Settings'.
2. Scroll to and select 'USB Mode' (or 'Mode').
3. Scroll to and select 'MTP' (or 'PlaysForSure Mode').
4. Connect the device to your computer.
5. Open 'My Computer > Sansa Fuze'.
6. Delete any WMA (Windows Media Audio) files you see that are of books you cannot play.
7. Open the OverDrive Media Console and attempt to transfer the audio book again.

Senin, 30 Maret 2009

Windows Media Player 11 and Sansa Players

Over the past year of so I've heard about a lot of "Synchronize to Continue..." error messages on Sansa players. A colleague sent along the following suggestion to roll back Windows Media Player 11 to the previous version of WMP (usually WMP 10). I am very happy to say that the patron having trouble with the Sansa M200 player now has a workable player again after rolling back to WMP 10.


Here are the full instructions.

Thanks, James!

1. Disconnect any portable music or video devices that might be
attached to your computer.
2. Click Start, and then click Control Panel.
3. In the Category View of Control Panel, click Add or Remove
Programs, and then click Remove a program.
4. Click Windows Media Player 11, and then click Remove.

If Windows Media Player 11 is not displayed in the list of currently installed programs, then try the following:

1. At the top of the list, select the Show updates check box.
2. In the Windows XP - Software Updates section, click Windows Media Player 11, and then click Change/Remove.
5. In each of the two confirmation dialog boxes that appear, click OK.
6. When the rollback process is complete (it might take several
minutes), click Restart.
7. Click Start, and then click Control Panel.
8. In the Category View of Control Panel, click Add or Remove Programs, and then click Remove a program.
9. Click Windows Media Format 11 Runtime, and then click Remove.

If Windows Media Format 11 Runtime is not displayed in the list of currently installed programs, then try the following:
1. At the top of the list, select the Show updates check box.
2. In the Windows XP - Software Updates section, click Windows Media Format 11 Runtime, and then click Change/Remove.

If you installed a non-US English version of Windows Media Player 11, the instructions in the dialog boxes that are mentioned in steps 9, 10, and 11 might appear in English.

10. In the first confirmation dialog box that appears, click OK.
11. In the second confirmation dialog box that appears, select the
Do you want to continue with the rollback? check box, and then click OK.
12. When the rollback process is complete (it might take several minutes to complete), click Restart.
13. Click Start, and then click Control Panel.
14. In the Category View of Control Panel, click Add or Remove Programs, and then click Remove a program.
15. Click Microsoft User-Mode Driver Framework Feature Pack 1.0.0, and then click Remove.
16. Follow the instructions that appear in the Software Update Removal Wizard.
If the Wudf01000 confirmation dialog box appears, click Yes to continue. When the software removal process is complete (it might take several minutes to complete), click Finish.

Note: If you remove Windows Media Player 11 and the Windows Media Format 11 Runtime, and then encounter error C00D271D ("A problem has occurred in the Digital Rights Management component. Contact Microsoft product support."), you might be able to resolve the problem by installing the Windows Media Format 9.5 Runtime. For information about installing the Runtime, in the Microsoft Knowledge Base, see article 891122, "Update for Windows Media Digital RightsManagement-enabledplayers."

You might not be able to roll back to a previous version of the Player if the hidden folder $NtUninstallwmp11$ is deleted from your computer. Some non-Microsoft programs (such as CCleaner) delete this folder in an attempt to remove unwanted files from your computer.

Senin, 23 Maret 2009

Sansa M200 Players Removed from Compatible Devices

After a series of emails to troubleshoot a "Synchronize to Continue Your Music Subscription" error (showing up on many types of Sansa devices), OverDrive's tech support team has removed the Sansa M200 series of players from the compatible devices page:
Based on the device specifications, the Sansa m200 series devices should work with OverDrive Audiobooks as they support the DRM protected WMA file format, as well as MP3 (the formats in which our titles are delivered). Some users have had success using Sansa m200 series devices with OverDrive Audio Books. Unfortunately, due to various complaints regarding the performance of these devices, including the issue your patron is experiencing, we have had to remove the devices from our compatibility list.

Selasa, 03 Maret 2009

Sansa Clip: Firmware Update

What is a firmware update? Think of it as updating your tiny device's operating system. Firmware updates typically include new, useful features. In the case of my new Sansa Clip, it provided a "resume playback" feature to audiobooks!

Here are instructions on updating a Sansa Clip. These instructions might be applicable to other Sansa devices.

  • Download the Sansa Updater exe file.


  • Run the exe file to install the application.

  • The application looks like this:

  • Plug in your device when prompted.

  • Download the firmware update.

  • You'll be prompted to unplug the device to complete the firmware update.

  • If possible, leave your device alone for a while to allow the updates to take effect. (I was anxious to get started and found that I didn't see the necessary update for a few minutes -- or I simply missed it...)


Read more: Step 2 Enabling "resume playback" mode.

FYI: To find out if your Clip would benefit from a firmware update, check out the two threads concerning firmware updates on the Sansa Clip forum.

Sansa Clip: Resume Playback Feature

The firmware update to a Sansa Clip allows for a "resume playback" feature when audiobooks are transferred to the "Audiobooks" folder. Here are the instructions to add OverDrive audiobooks to the correct folder to enable this feature.

  1. There is no need to create an Audiobooks folder on your device; the firmware update has done this for you. (This was my first mistake.)

  2. Did you give the update some time to take effect? (Another mistake of mine...)

  3. Checkout and download a book to your computer like normal.

  4. Open OverDrive Media Console, if necessary.

  5. Select the desired audiobook.

  6. Plug in your player.

  7. Wait a minute to let Windows recognize your player.

  8. Click the transfer button.

  9. A dialog box will open showing the name of the audibook.

  10. Click "next."

  11. On the dialog box that shows the parts of the audiobook, click on the "Advanced Options..." button.

  12. You may be asked if you wish to create a new folder for the title. Click "no."

  13. A new "Advanced Options" dialog box loads. From this box, click on "Browse."

  14. Choose "Audiobooks" instead of "Music."

  15. Notice that the path in the Advanced Options dialog box has changed to "Audiobooks."

  16. Click "Ok."

  17. Click "Next" to start the transfer.

  18. The book will transfer as normal.

  19. You'll be prompted to unplug your player.

  20. Unplug.

  21. Turn on your device.

  22. You'll find the audiobooks under: Music >> Audiobooks >> Title.

  23. When you return to a title that you'd previously listened to, you'll see a menu item "Resume Playback." Choose that option to continue with the audiobook.

Senin, 02 Maret 2009

Troubleshooting: Sansa Fuze

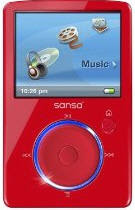
Photo from AmazonI continue to hear about "sync" problems with the Sansa devices. This is the most common scenario: A patron will be using the player for a while without problems and then, out of the blue, they get an error message on their device saying that they'll need to synchronize to continue the music subscription. There appears to be different steps involved for each of the Sansa models. Here is a possible* solution for a "synchronize to continue your music subscription" error encountered on the Sansa Fuze.

*I say "possible" because although the instructions came from tech support, I haven't heard from the patron whether it worked or not... I'll update this post if I find out that this worked. If this solution works (or doesn't work) for you, leave a comment on this post.

1. Open "My Computer"

2. Turn off the Sansa Fuze.

3. Put the device in Hold (move Hold button until orange is showing)

4. Press and hold the Left Button

5. Plug the 30 pin connector into the device (be sure the USB is plugged into the computer)

6. Wait for the Sansa Fuze drive(s) to show up

7. Right click on "Sansa Fuze" select format. File system "FAT32", uncheck quick format then "Start"

8. Follow instructions below and drag files to the Sansa Fuze drive.

Once you have completed the format, upgrade the firmware on their device using the following link:

http://www.sandisk.com/Retail/Default.aspx?CatID=1376

See the recent blog post on ungrading the firmware for a Sansa Clip.